Mid Century Style Flower Gable Favor Box: Create Beautiful Handmade Packaging for Every Occasion
Finding packaging that feels both personal and polished can be surprisingly difficult. Store-bought favor boxes often look generic, and standard gift bags lack the charm that makes a moment feel special. The Mid Century Style Flower Gable Favor Box offers a creative solution that blends retro elegance with hands-on crafting. Using a digital paper-cut template, you can produce carrier-style gift boxes featuring a decorative flower cutout window, transforming simple cardstock into something memorable.
This article walks you through everything you need to know about working with this design, from understanding the template structure to choosing the right materials, adjusting sizes, and pairing your finished boxes with the perfect contents. Whether you are planning a spring wedding, preparing Easter treats, or simply looking to elevate everyday gift wrapping, these gable boxes bring a thoughtful, handmade quality that recipients will notice.
What Is the Mid Century Style Flower Gable Favor Box
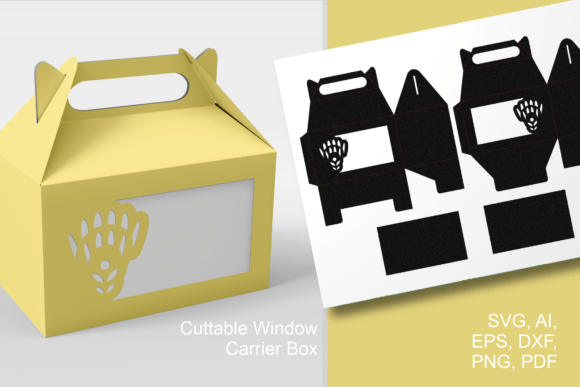
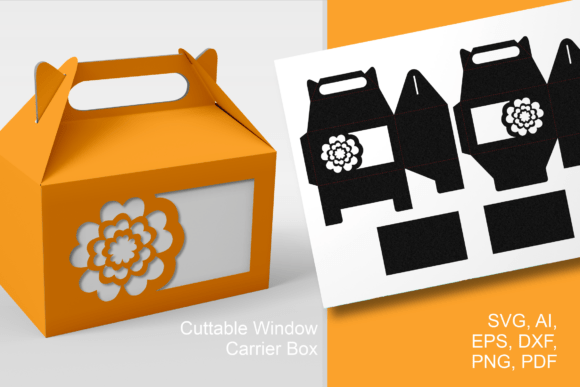
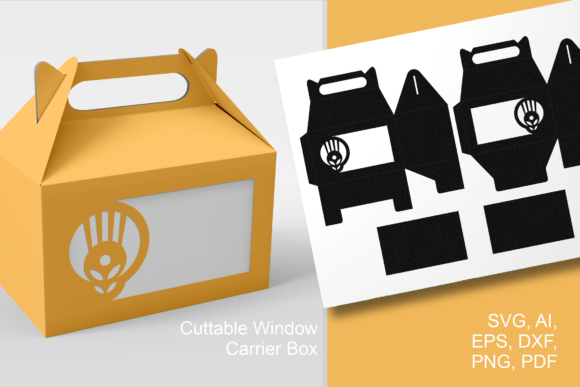
At its core, this is a digital template for a gable-style favor box that incorporates a wide window cutout featuring a mid-century flower motif. The window appears on both the front and back of the box, creating decorative see-through panels that reveal the contents inside. The design draws inspiration from the clean lines and organic floral shapes associated with mid-century modern aesthetics, giving your packaging a timeless yet fresh feel.
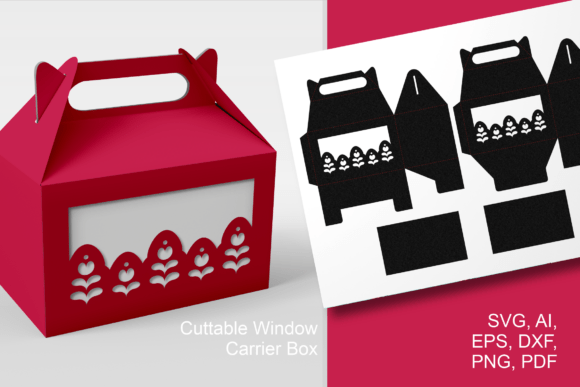
The template itself consists of four separate parts. Two parts form the main box structure with the flower-shaped cutouts already integrated into the design. The other two parts serve as transparent inserts that sit behind the decorative windows, holding your treats securely while still allowing them to be seen. This layered approach means you do not need to figure out how to attach acetate or cellophane separately; the template accounts for everything.
Once cut and assembled, the finished box measures approximately 4 by 6.5 by 6.5 inches, or roughly 10 by 16 by 16 centimeters. The gable handle on top makes it easy to carry and adds to the charming, market-fresh presentation. Because the template is delivered as a vector-based digital file, you retain full control over resizing it to suit smaller candies, larger baked goods, or anything in between.
Why Handmade Packaging Matters for Special Events
When you host a gathering, the small details often leave the strongest impression. Guests may not remember every course of a meal, but they do remember the personalized favor waiting at their place setting. Mass-produced options can feel impersonal, and custom-printed boxes from professional services can quickly become expensive, especially for larger events.
Making your own gable boxes using this mid-century flower design bridges the gap between cost and quality. You invest time instead of a large budget, and the result is something that reflects care and intentionality. The decorative flower window adds a layer of visual interest that a plain box cannot match, while the see-through panels create anticipation before the recipient even opens the package. For anyone who values presentation, this template provides a strong foundation to build upon.
How the Template Structure Works for You
Understanding the four-part layout helps you plan your project efficiently. The two main box pieces form the structural body, including the gable top, the side panels, and the wide flower window cutouts on the broader front and back faces. The two transparent insert pieces are sized to fit behind these windows, meaning you can use clear acetate, vellum, or even translucent colored paper depending on the effect you want.
Because the windows are designed as part of the cut file, your cutting machine handles the intricate flower shapes with precision. There is no need to trace, hand-cut delicate curves, or worry about inconsistent results from box to box. Once the pieces are cut, assembly follows a logical sequence that most crafters can complete in just a few minutes per box once they get into a rhythm.
Choosing Materials That Enhance the Design
The type of cardstock you select has a significant impact on both the look and the stability of your finished gable box. A medium-weight cardstock, typically between 200 and 250 grams per square meter, provides enough structure to hold candies, cookies, or small gifts without buckling. Heavier stock works well for larger items, while lighter paper may be suitable for very small favors, though it can feel flimsy if the box is handled frequently.
Color choice also matters. Solid pastel shades like soft yellow, mint green, or blush pink reinforce the mid-century spring aesthetic and contrast beautifully with the flower cutout. Kraft paper offers a rustic, natural look that works well for garden parties and casual celebrations. If you want to add metallic accents, consider using a scoring tool on your machine to create clean fold lines, then apply gold or copper paint sparingly along the gable edges for a hand-finished touch.
For the transparent inserts, clear acetate sheets are widely available and easy to work with. Vellum creates a softer, diffused look that partially obscures the contents, adding a sense of mystery. You can also experiment with tinted transparency film in colors that coordinate with your event palette.
File Formats and Cutting Machine Compatibility
This Mid Century Style Flower Gable Favor Box template arrives in multiple file formats to accommodate different workflows. Vector files include SVG, EPS, AI, and DXF, making the design compatible with popular cutting machines such as Cricut and Silhouette devices. If you prefer to use a PDF, a vector-based version is included, allowing you to print and hand-cut the pieces using a craft knife and a steady hand. Transparent PNG and JPG files provide additional flexibility for those who want to preview the design or incorporate it into other projects.
For cutting machine users, importing the SVG or DXF file into your software typically requires minimal adjustment. The cut lines and score lines come pre-defined, though you may need to assign the correct actions within your program. Test-cutting a single piece on scrap paper before committing to your final cardstock is always a smart step, saving both material and frustration.
Practical Assembly Steps for Consistent Results
Once your pieces are cut, gather a few basic supplies. You will need a strong craft glue or double-sided tape, a bone folder for crisp folds, and your prepared transparent inserts. Start by assembling the two main box sections, folding along the score lines carefully. Attach the transparent window pieces to the inside of each broad panel so that the flower cutout is fully covered from behind. Then join the box sides and secure the bottom closure. The gable handle tops come together naturally once the main body is formed.
Working in batches can speed up the process considerably. If you are making twenty boxes for a wedding, cut all pieces first, then move through each assembly stage assembly-line style. This approach helps you develop a consistent technique and ensures all boxes look uniform. Setting aside an afternoon with a friend or family member can turn the project into a pleasant shared activity rather than a solo chore.
Occasions That Call for a Mid-Century Flower Favor Box
The versatility of this design makes it suitable for a wide range of events and seasons. Spring holidays like Easter are a natural fit, with the flower motif echoing the blooming season. Fill the boxes with small chocolate eggs, jelly beans, or homemade shortbread cookies tied with a pastel ribbon around the gable handle for an extra festive detail.
Weddings are another prime opportunity. Place one box at each guest's seat containing sugared almonds, mints, or a handwritten note of thanks. The mid-century flower pattern adds a vintage romantic feel without competing with your broader decor. For bridal showers, fill the boxes with fragrant tea bags or bath salts, turning a simple favor into a sensorial experience.
Beyond formal events, these boxes serve beautifully for everyday gift wrapping. A batch kept on hand makes last-minute hostess gifts feel intentional. Slip a few homemade doughnuts or cookies inside, tie the handle with baker's twine, and you have a gift that looks far more thoughtful than anything wrapped in cellophane. Birthday parties, baby showers, and even small corporate appreciation gifts benefit from the elevated presentation.
Adapting the Size for Different Contents
One of the greatest advantages of a digital template is scalability. The default dimensions produce a box roughly 4 by 6.5 by 6.5 inches, which comfortably holds a generous handful of candies, several cookies, or a small jar of preserves. However, you are not locked into this size. Within your cutting software, you can scale the entire design proportionally to create smaller boxes for delicate truffles or miniature favors, or enlarge it for items like a whole doughnut stack or a small loaf of bread.
When resizing, keep in mind that structural integrity depends on your material choice. A larger box cut from the same cardstock weight may feel less sturdy, so consider stepping up to a heavier paper for dimensions above the default. Similarly, very small boxes may not need the same thickness, and lighter cardstock can be easier to fold neatly at tiny scales. Testing one prototype at your target size will answer most questions before you commit to a full production run.
Adding Personal Touches Without Overcomplicating the Design
The flower window already does significant decorative work, so additional embellishments can be kept simple. A small tag tied to the gable handle with the recipient's name or a short message adds personalization without obscuring the mid-century motif. Ribbon in a contrasting or complementary color wrapped around the box just below the handle provides another layer of texture.
If you want to incorporate color into the flower cutout itself, consider sandwiching a piece of colored tissue paper or patterned scrapbook paper between the box wall and the transparent insert. This technique makes the flower shape pop against the contents without requiring any additional cutting or gluing. For evening events, placing a small battery-operated LED tea light inside transforms the box into a glowing centerpiece that highlights the intricate cutout pattern.
Storing and Transporting Your Finished Boxes
Gable boxes made from cardstock are reasonably durable, but they benefit from careful handling, especially if assembled ahead of time. Store empty boxes nested or laid flat in a sturdy container to prevent crushing. If you are transporting filled boxes to a venue, packing them snugly in a box with tissue paper between each one helps the gable handles stay upright and the flower windows remain undamaged. For outdoor events, be mindful of humidity, which can soften cardstock over time. Assembling the boxes a day or two before the event and keeping them in a cool, dry space usually works well.
Why Crafters Keep Returning to This Design
What sets the Mid Century Style Flower Gable Favor Box apart is the balance it strikes between visual impact and practical functionality. The flower window makes the box feel decorative and special, while the gable structure keeps it easy to fill, carry, and open. The template format respects your time and skill level, whether you are a seasoned paper crafter with a cutting machine or someone who enjoys precise hand-cutting with a printed PDF guide.
Many crafters find that once they have made a batch, they look for other excuses to use the design again. The ability to change cardstock colors, transparency materials, and fillings means the same template can produce vastly different results suited to Christmas, birthdays, autumn gatherings, and everything in between. A simple switch from pastel paper to deep green or burgundy transforms the mood entirely, proving that a well-designed template is an investment that pays off across many projects.
Getting Started with Your First Batch
Begin by downloading your preferred file format and performing a test cut. Choose your cardstock and transparency material, then assemble one complete box to refine your technique. Pay attention to how the fold lines behave with your chosen paper and whether your glue or tape method creates clean seams. Once you feel confident, calculate how many boxes you need and set up your cutting files to maximize material usage, arranging the pieces closely on your virtual mat to minimize waste.
If you are working toward a specific event, give yourself extra time beyond what you think the project requires. Unexpected interruptions happen, and the assembly phase always takes slightly longer than anticipated when you want every box to look pristine. Building in a buffer reduces stress and keeps the creative process enjoyable, which is the whole point of making something by hand in the first place.
The Mid Century Style Flower Gable Favor Box represents more than just a container. It is a way to share something you have made with care, presented in packaging that communicates thoughtfulness before the gift inside is even revealed. Whether filled with Easter candy, wedding favors, or everyday baked goods, these boxes turn simple offerings into small celebrations of creativity and connection.